Today, after all the prolonged agonising over markings, I was actually going to sit down and make some effort to realise them in some form or another. I've been rereading David Copperfield, you may recall, and at this stage I felt some sympathy for Mr Dick and his neverending struggles to get his testimonial onto paper.
Anyway, as soon as I started trying to cut out painting masks, I realised it was a pretty hopeless exercise. There's no way I'm going to get the precise results I want this way. So now I'm revisiting the idea of getting custom decals made. Waterslide decals are very expensive, but dry transfers seem much more affordable and so they look like a feasible option. Of course, you have to get the positioning right first time; but if you tape the sheet in place before wielding the ball-point pen or your preferred burnishing tool, it's not too difficult. So I've started investigating potential suppliers.
More soon, I hope.
Saturday, 10 December 2011
Friday, 2 December 2011
From the family archives

He's in the next photo though (bottom right).
 |
| That ad for the genealogy website isn't lying, you know. |
 |
| Oops |
Wednesday, 30 November 2011
Sopwith Dolphin - yet more vacillation over markings
Still haven't got very far with the markings. All I seem to have been doing over the last few weeks is experimenting half-heartedly with one technique or other, finding flaws with it and getting discouraged.
But it's becoming clear that what I'm going to have to do in the end is cut masks and spray the markings directly onto the surface. There are problems with this technique, of course, the main ones being:
- It's difficult to cut clean circles in masking tape: the circle cutting tool tends to cause tearing and it's difficult to cut a circle that meets up with itself properly.
- Because of the poor planning evident at this stage, I'm going to be spraying white on a darker colour. This necessitates quite a thick coat. This means ridges.
- It's a bit scary
- Cut lots of masks until I get enough useable ones.
- Rub down paintwork after spraying. To avoid damaging the Gloss Cote, I'll have to use quite a fine abrasive: maybe good old 1200 wet and dry followed by toothpaste.
- Grit my teeth
The only remaining problem is that it will take ages to apply the masks, and I don't want to leave the masking tape on for too long, so I've got to wait for a free weekend. Until then, I'll have to do other stuff. As it happens, I've started re-reading David Copperfield (it's Christmas, you see: Dickens is mandatory), and at the moment it's not clear which will turn out longer: the road to acceptable markings, or the road to Dover. Time will tell.
More in due course.
Wednesday, 23 November 2011
Sopwith Dolphin - more work on markings

I've been doing some experimentation with decals. I got some Experts-Choice inkjet decal film recently and I wanted to see what it was like to use. And at first glance it seems like pretty magic stuff. The picture above shows some roundels that I drew up in TurboCAD, and they look great. The last time I tried this sort of thing was about 10 years ago, on my abortive SE5A project, and the decal paper I used then was about an inch thick and didn't actually seem to stick to anything. So I was a bit dubious this time round, but things have obviously moved on in the meantime. I'm pretty impressed.
Monday, 21 November 2011
Sopwith Dolphin - markings
Haven't made any more progress on the problems I've had recently with the simple task of spraying an even coat of varnish onto a model. I think I might try the idea of overspraying with Satin Cote: and I've realised that I can try this on the tailplane because it doesn't need any decals. Then, if this works, I can do the decals on the upper wings knowing that the Satin Cote will solve the problem.
Wednesday, 9 November 2011
Sopwith Dolphin - further cackhandedness
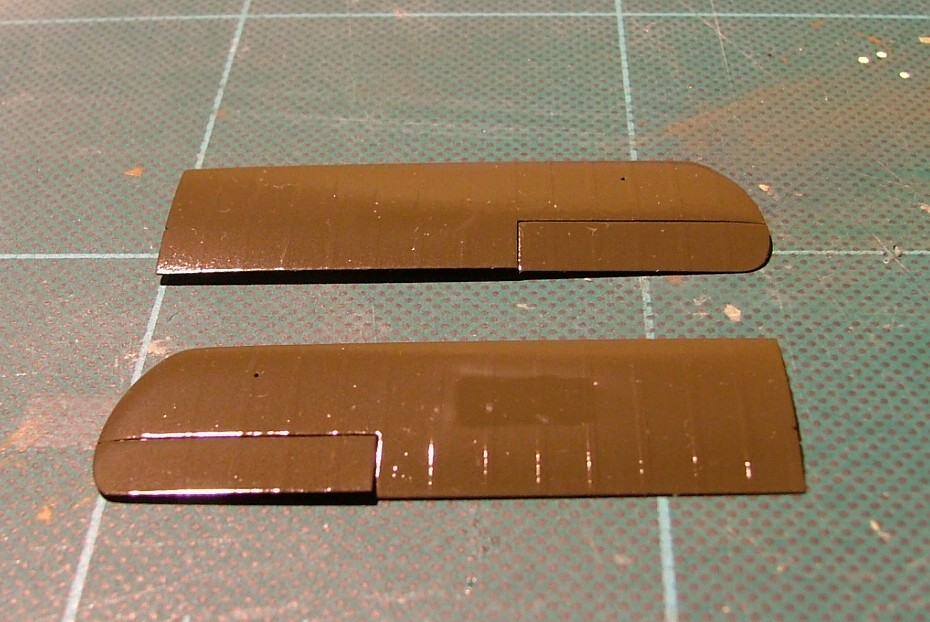
I was nearly ready to do the decals, but I've mucked it up again. The picture shows the upper wings after their coat of Gloss Cote, and somehow I've managed to get a kind of discoloured rectangle right in the middle of each one.
Friday, 14 October 2011
Sopwith Dolphin - progress of a kind

Well, that's the main paintwork done. I was hoping to have started doing the decals by now, but there have been a few setbacks and I've started recognising a certain reckless tendency in my recent efforts. This tendency probably arises from boredom and pressure, and has on previous occasions led to disaster. So I'm calling a halt now for a few weeks, before the quality of my work goes into a steep dive that can end only in the wastebasket.
Sunday, 9 October 2011
Realistic Historical Battles on Film
I happened to catch a bit of Oliver Stone's well-meaning biopic of Alexander the Great the other night. The critical panning was perhaps well-deserved but his heart was in the right place and it's worth sticking with until the battle of Gaugamela. After that, by all means, switch off without any fear of missing anything of importance. But the battle itself has to be the most realistic ancient battle ever depicted in film. As far as I can remember, it happened pretty much as described by the ancient historians, though the dramatic touch of an eagle's eye view featuring an actual eagle was slightly novel. Perhaps Harry Hill was a consultant.
So anyway, here's my top two historically accurate cinematic battles
1. Gaugamela (Alexander)
2. Waterloo (Waterloo)
There must be more.
So anyway, here's my top two historically accurate cinematic battles
1. Gaugamela (Alexander)
2. Waterloo (Waterloo)
There must be more.
Sopwith Dolphin - At last...
 |
| Le PC10 est arrivé - finalement |
Sopwith Dolphin - more progress with paintwork
 |
| A bit of a grey area |
This is my Dolphin after a bit of tidying up. As I had expected, there was a bit of damage when I removed all the various types of masking, and the main culprit was the masking solution. It was impossible to stop it straying slightly beyond the edges of the apertures, so it left ragged edges. So then I had the job of rubbing down with 1200 wet and dry and retouching. Under a magnifying glass, you can see the patches, but to the naked eye (or a 3 megapixel camera) it looks fine, doesn't it?
But then, having patched up the real damage, I'm going to add some simulated damage later. Apparently, the paint was prone to flaking off the aluminium panels in real life, so I'm going to do some drybrushing on the edges that would experience most wear. But for the moment, it can keep its factory finish.
Tuesday, 4 October 2011
Sopwith Dolphin - nose corrected

Right, that's the nose job done. This time I managed to reduce the swarms of dust and small particles to a more manageable level, much as NASA has just done with its asteroid survey. And I am pleased to say that it's all been a complete success. The colour is a slightly darker shade of grey now - and that's a phrase you don't want to hear after a nose job. In this case, however, I think it looks a lot more convincing. Tomorrow I will, so to speak, remove the bandages and assess the damage.
Sunday, 2 October 2011
Sopwith Dolphin - more paint being splashed about
 |
| Pope surrenders to half-built model aeroplane |
More progress on the paintwork. The picture shows the first coat of battleship grey on the plywood and aluminium panels. It's been quite a job to get this far, though. I've spent most of the day applying various types of masking. I suppose it's a bit easy to criticise a design 94 years after the event, but the Dolphin did seem to have rather a lot of apertures of one sort or another.
Wednesday, 21 September 2011
Sopwith Dolphin - more ideas on bodged paint job on wings
After some thought and a bit of experimentation, I've decided that the wing surfaces will after all need a bit more work. Not only are the ribs a bit too prominent and jagged, but there are an annoying number of little bits stuck to the painted surfaces, even though I had brushed all the surfaces with a soft brush before doing the final coat. Perhaps I charged them with static in the process, thus attracting the small bits. I'll have to be careful about that in future. In addition to those problems, I've decided that the colour I've used for Clear Doped Linen is far too rich and I need to tone it down a bit.
Sopwith Dolphin - rethink on wings
Having looked a bit more closely at the paint job I've done on the undersurfaces, I've decided that the wing ribs are not quite right: they've come out a bit too jagged, with an obvious ridge at each side caused by the masking tape. This is what comes of not doing a coat of primer to reveal this sort of problem. Also, the clear doped linen effect has turned out to be more of a custard effect. I might have to rub the wings down with 1200 wet and dry and do another coat or two of a slightly lighter colour. But then I'm in danger of making the rib detail disappear altogether.
I'm going to have to ponder this for a while.
I'm going to have to ponder this for a while.
Monday, 19 September 2011
Sopwith Dolphin - Undercarriage

Sunday, 18 September 2011
Sopwith Dolphin - In Colour

I've just done the first coat of the undersurfaces, as you can see, with a kind of clear-doped linen colour. The wing ribs are showing up nicely, I think. Because of their dark colour I had to do two or three coats, but to save repeatedly cleaning the airbrush, I only waited a few minutes between coats (until the finish had gone matt). Enamel paint is very forgiving of this sort of treatment. Even when I got a few spatters (too thick mixture maybe? Incompetent airbrush technique?), they just flowed out when oversprayed. So I think it's all looking OK so far. I'm going to wait until tomorrow to see if another coat is needed. But at this rate, we're getting close to seeing some actual PC10 in this blog.
Monday, 29 August 2011
Sopwith Dolphin - Lower wings added
 |
| This is what a regency biplane would have looked like |
At last, I've got the lower wings in place. You will also see that I've done the rib effect. So now everything's ready for painting.
Tuesday, 2 August 2011

Wednesday, 27 July 2011
Sopwith Dolphin - More work on wings

Sunday, 24 July 2011
Curved Wings
 |
| It Happened Today* |
Sanding Fixture
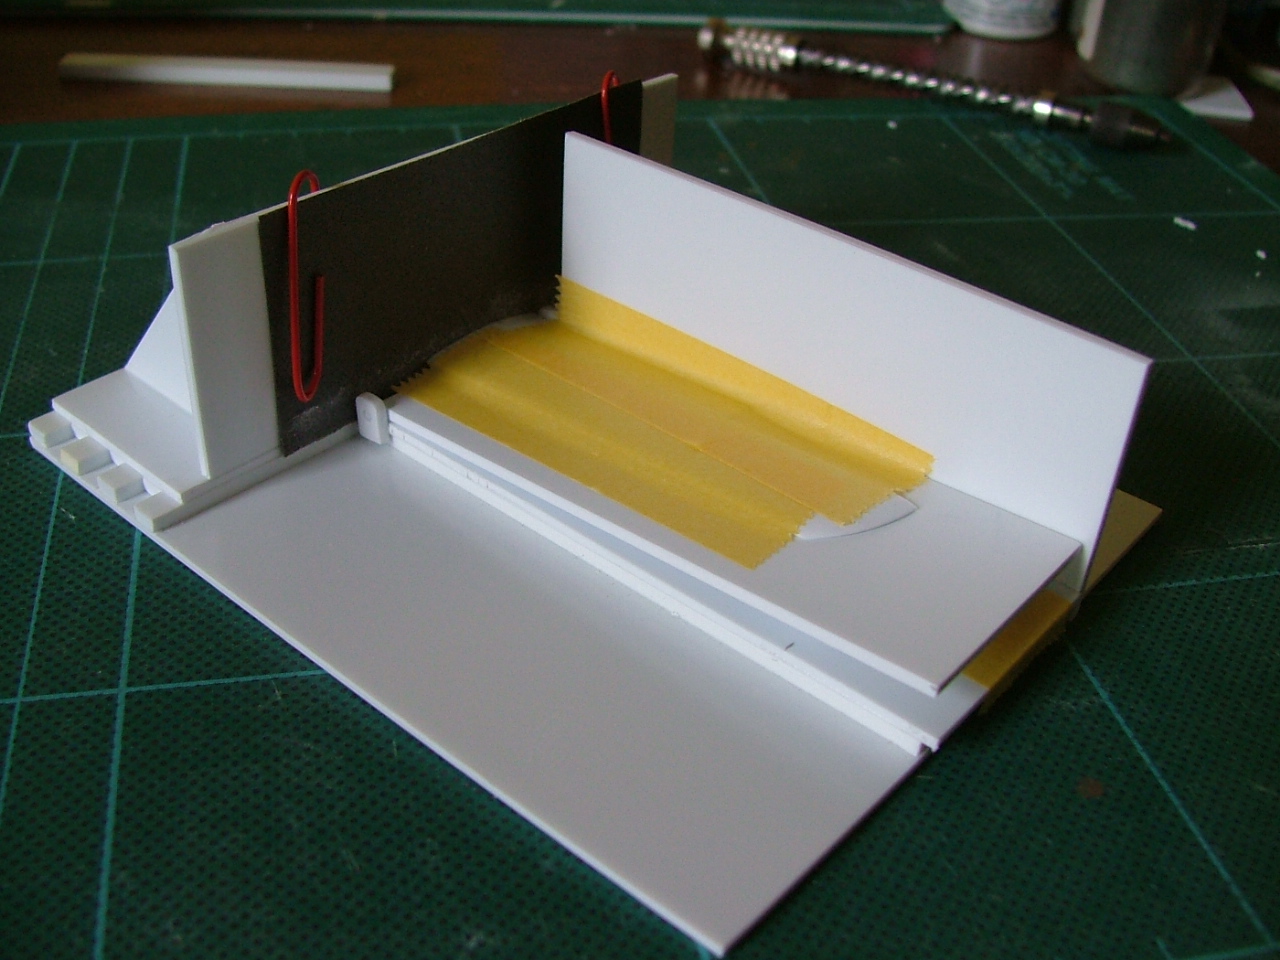
Progress of a kind, though not very exciting.
Wednesday, 13 July 2011
Sopwith Dolphin - Further Progress on Wings
 |
| Put 'em together and what have you got? |
Right, I've nearly got the wings finished, and the tail as well for good measure. And I'm quite pleased about it. I have to admit, I wasn't sure what sort of results I would be able to achieve with my ad-hoc techniques. But I think it's all turned out OK so far.
Sunday, 10 July 2011
Sopwith Dolphin - Some progress on wings
 |
| Wings in various stages of completion |
At last, I've made some more progress on the wings. Since I'd already made one of them, the task I faced when I finally got down to work again was simply to repeat the procedure three times (see previous post). Easy! But for some reason I felt daunted enough to take a break for a couple of months before starting this stage of the project.
Friday, 15 April 2011
Sopwith Dolphin - Fuselage Finished

Wednesday, 13 April 2011
Sopwith Dolphin - Fuselage nearly finished

Thursday, 7 April 2011
Sopwith Dolphin - Some Progress

Saturday, 26 February 2011
Sopwith Dolphin - Wings

Sunday, 20 February 2011
SE5A - An unsuccessful attempt

Monday, 14 February 2011
Sopwith Snipe
 |
| Not imaginary |
I seem to remember from an episode of Cheers that a snipe hunt is a wild goose chase. Well, as it happens, there was a time when if you tried to find a Sopwith Snipe in kit form that certainly would have been a wild goose chase. See what I did there?
Sunday, 13 February 2011
Early effort - Sopwith Camel
 |
| Man builds kit 10 years ago! |
Subscribe to:
Posts (Atom)